Editorial
How to Zip and Unzip Files in Windows
Learn how to zip and unzip files in Windows using the built-in compression features or popular third-party tools like 7-Zip and WinRAR.
Working with digital files often involves organizing, sharing, and archiving them efficiently. One of the most common ways to do this is by using compressed (zipped) folders. Zipping files reduces their size, making them easier to send via email or save on storage, and allows you to bundle multiple files and folders into a single, convenient package. Conversely, unzipping files extracts the original content from a compressed folder.
Windows has excellent built-in capabilities for managing zip files, and there are also powerful third-party tools that offer more advanced features. This guide will walk you through how to zip and unzip files in Windows using both native methods and popular external software.
What are Zipped Files and Why Use Them?
A zipped file (often ending in .zip extension) is an archive format that compresses one or more files and/or folders into a single file.
Benefits of Zipping Files:
- Reduced File Size: Zipping files makes them smaller, saving disk space and reducing upload/download times.
- Easier Sharing: Combine multiple files and folders into a single .zip file, making it much simpler to attach to emails or upload to cloud services.
- Faster Transfers: Smaller files transfer quicker, whether over a network or to a USB drive.
- Organization: Keep related files together in one neat package.
Method 1: Using Windows’ Built-in Compression Features (No Software Needed)
Windows (since XP) has native support for .zip files, allowing you to compress and decompress without installing any extra software.
How to Zip Files in Windows:
This is how you compress individual files or a group of files into a .zip archive.
- Locate Your Files/Folders: Open File Explorer and navigate to the files or folders you want to zip.
- Select Items:
- To select a single file or folder, just click it.
- To select multiple individual files/folders, hold down the Ctrl key and click each item.
- To select a contiguous group, click the first item, hold Shift, and then click the last item.
- To select all items in a folder, press Ctrl + A.
- Initiate Compression:
- Windows 11: Right-click on one of the selected items. Hover over “Compress to ZIP file” in the context menu. You can also select “Send to” and then “Compressed (zipped) folder” if the first option isn’t directly visible.
- Windows 10: Right-click on one of the selected items. Hover over “Send to” in the context menu, then select “Compressed (zipped) folder.”
- Name the Zip File: A new .zip archive will be created in the same location as your original files. Its name will be highlighted.
- By default, it will be named after one of the selected items.
- Type a new, descriptive name for your zip file (e.g., “Vacation Photos 2024,” “Project Documents”).
- Press Enter to save the name.
- Verify: You’ll now see a new file with a .zip extension and a folder-like icon with a zipper. Your original files remain untouched.
How to Unzip Files in Windows:
This is how you extract the contents of a .zip archive.
- Locate the Zip File: Open File Explorer and navigate to the .zip file you want to unzip.
- Initiate Extraction:
- Option A: Using the Ribbon (Windows 11/10): Click on the .zip file once to select it. In the File Explorer ribbon at the top, you should see a “Compressed Folder Tools” tab. Click it, then click “Extract All.”
- Option B: Using Right-Click Context Menu: Right-click on the .zip file and select “Extract All…”
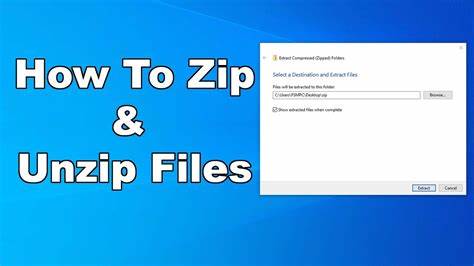
- Choose Destination: The “Extract Compressed (Zipped) Folders” dialog box will appear.
- Destination: By default, it will suggest extracting the contents into a new folder with the same name as the zip file, located in the same directory.
- Click “Browse…” if you want to choose a different destination folder.
- “Show extracted files when complete”: You can check or uncheck this box.
- Start Extraction: Click “Extract.”
- Access Extracted Files: A new folder containing all the unzipped files and folders will appear in your chosen destination.
Method 2: Using Third-Party Compression Software (Advanced Features)
While Windows’ built-in features are good for basic zipping and unzipping, third-party programs like 7-Zip and WinRAR offer more advanced compression formats (like .7z, .rar), stronger encryption, better compression ratios, and more control over the archiving process.
Popular Third-Party Tools:
- 7-Zip: Free and open-source. Supports 7z, ZIP, RAR, ISO, and many other formats. Excellent compression.
- WinRAR: A popular shareware (paid after trial) program. Known for its .rar format support and robust features.
- WinZip: One of the oldest and most well-known, offering extensive features but also a paid model.
How to Zip Files with Third-Party Software (General Steps):
These steps are generalized, as interfaces may vary slightly between programs.
- Install Software: Download and install your chosen program (e.g., 7-Zip, WinRAR) from its official website.
- Select Files/Folders: In File Explorer, navigate to and select the files/folders you want to zip.
- Initiate Compression:
- Right-click on the selected items.
- You’ll see a new entry in the context menu for your installed software (e.g., “7-Zip” or “WinRAR”).
- Hover over it, then select an option like “Add to archive…” or “Add to ‘[archive name].zip'” (for quick creation).
- Configure Archive (if “Add to archive…” chosen):
- A dialog box for the software will open.
- Archive format: Choose ZIP (or 7z, RAR if you want to use those formats).
- Compression level: Adjust for file size vs. compression time.
- Archive name: Specify the name and destination path for the new .zip file.
- Password/Encryption (Optional): Many tools allow you to set a password to encrypt the archive, protecting its contents.
- Split to volumes (Optional): Divide the archive into smaller parts for easier transfer.
- Create Archive: Click “OK” or “Add.”
How to Unzip Files with Third-Party Software (General Steps):
- Install Software: Ensure the third-party program is installed.
- Locate the Zip File: Navigate to the .zip (or .7z, .rar) file you want to unzip.
- Initiate Extraction:
- Right-click on the compressed file.
- Hover over the software’s name (e.g., “7-Zip” or “WinRAR”) in the context menu.
- Select an extraction option:
- “Extract files…”: Opens a dialog to choose the destination folder.
- “Extract Here”: Extracts content directly into the current folder.
- “Extract to [folder name]”: Creates a new folder with the archive’s name and extracts contents there (most recommended for organization).
- Enter Password (if applicable): If the archive is password-protected, you’ll be prompted to enter the password.
- Access Extracted Files: The files will be extracted to your chosen location.
Common Issues and Tips
- Corrupted Zip File: If you receive an error during unzipping, the .zip file might be corrupted. Try redownloading it or requesting the sender to re-create it.
- Password Protected: If you can’t open a .zip file, check if it’s password-protected. The sender should provide the password.
- Hidden Extensions: If you’re struggling to see file extensions like .zip, ensure they are visible in File Explorer settings:
- Windows 11: File Explorer > View > Show > File name extensions.
- Windows 10: File Explorer > View tab > Check “File name extensions.”
- Large Files: For very large files (multiple gigabytes), direct transfer or cloud storage might be more reliable than zipping, especially over unstable networks.
- Compression Ratio: Not all files compress equally. Text documents compress very well, while already compressed files like JPEGs or MP4 videos will see minimal size reduction.
Knowing how to zip and unzip files in Windows is a fundamental skill for efficient file management, sharing, and storage. Whether you stick to the convenient built-in features or opt for the advanced capabilities of third-party tools, mastering these techniques will undoubtedly streamline your digital workflow.