Editorial
How to Use Windows Task Scheduler for Automation
Automate tasks on Windows with Task Scheduler! Learn how to create, manage, and troubleshoot scheduled tasks for more efficient PC use in this easy-to-follow how-to guide.
Ever catch yourself doing the same computer tasks over and over? Maybe running a backup script every night, launching an app when you start up, or clearing temp files regularly? Doing these manually can get pretty tedious—and honestly, it’s easy to forget or make mistakes.
Luckily, Windows has this neat built-in tool called Task Scheduler that can handle all that for you. It lets you automate programs, scripts, or commands to run at specific times or when certain things happen. I’ve used it tons for everything from syncing data automatically to running cleanups, and it really takes a load off your mind.
In this guide, I’ll take you through everything: creating your first task, diving into advanced options, and even troubleshooting common hiccups.
What is Windows Task Scheduler?
At its simplest, Task Scheduler is like a job scheduler for your PC. You set up a list of actions to happen automatically, triggered by things like time of day, system events (logging in, starting up), or even when your PC is idle. Think of it as your digital assistant, quietly running commands exactly when you need them.
Why Use Task Scheduler for Automation?
There are quite a few reasons why Task Scheduler is useful:
- Efficiency: It frees you from repetitive work so you can focus on other things.
- Reliability: Tasks run consistently without needing you to babysit them.
- Convenience: Automate in the background—no need to be at your PC.
- System Maintenance: Schedule cleanups, updates, and backups to keep things smooth.
- Customization: You can tweak triggers and actions to fit your exact needs.
Getting Started: Opening Windows Task Scheduler
First things first, let’s get you into Task Scheduler. There are a few ways:
- Search Bar:
- Click Start or press the Windows key.
- Type “Task Scheduler.”
- Select it from the results.
- Run Dialog:
- Press Windows key + R.
- Type taskschd.msc and hit Enter.
- Control Panel:
- Open Control Panel.
- Go to Administrative Tools.
- Click on Task Scheduler.
When you open it, you’ll see the interface: the left pane has the Task Scheduler Library (where your tasks live), the center shows task details, and the right pane gives you quick action buttons.
How to Create Your First Automated Task
Creating a task basically means telling your PC when to run something (trigger) and what to run (action). Let’s try a simple example: opening Notepad every day at a set time.
Method 1: Create Basic Task (Great for Beginners)
This wizard simplifies things.
- Open Task Scheduler.
- Click “Create Basic Task…” in the right-hand Actions pane.
- Name your task — maybe “Open Notepad Daily” — and add a description if you want.
- Pick the trigger, like “Daily.”
- Set the start date/time and recurrence (e.g., every day).
- For action, select “Start a program.”
- Browse to C:\Windows\System32\notepad.exe or just type notepad.exe.
- Review and finish. Check “Open the Properties dialog” if you want to tweak more settings right away (highly recommended if you’re curious).
Now, Notepad will pop up automatically every day at your chosen time.
Method 2: Create Task (For Advanced Users)
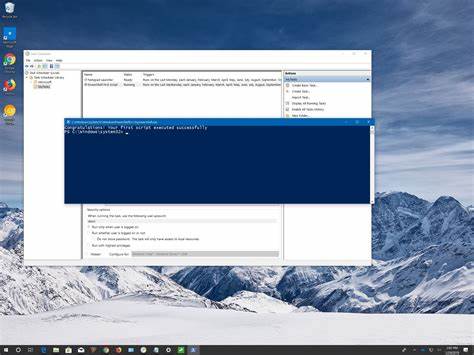
This one’s more powerful and flexible. Suppose you want to run a PowerShell script every Monday to clean temp files.
- Write your PowerShell script, e.g., CleanTemp.ps1:
powershell
Copy
Remove-Item -Path $env:TEMP\* -Recurse -Force -ErrorAction SilentlyContinue
Write-Host “Temporary files cleaned!”
Save it in C:\Scripts\CleanTemp.ps1.
- Open Task Scheduler.
- Click “Create Task…” in the right pane.
- On the General tab, name it “Weekly Temp File Cleanup” and add a description.
- Choose security options like “Run whether user is logged on or not” and “Run with highest privileges” if needed.
- In the Triggers tab, create a new weekly trigger for Monday at your chosen time.
- In Actions, set it to start powershell.exe with these arguments:
arduino
Copy
-NoProfile -ExecutionPolicy Bypass -File “C:\Scripts\CleanTemp.ps1”
- Conditions tab lets you fine-tune, like only running on AC power or waking the PC if it’s asleep.
- In Settings, you can set things like allowing manual runs, stopping runaway tasks, and handling multiple instances.
- Save everything and enter your password if prompted.
That’s it! You’ve got a scheduled cleanup running every week.
Managing Your Scheduled Tasks
After you’ve created some tasks, here’s how you keep track:
- View: Browse your tasks in the Task Scheduler Library.
- Enable/Disable: Right-click a task to pause or reactivate it. Useful if you want to test or pause automation temporarily.
- Run Manually: Run a task immediately to test it.
- End Task: Stop a running task if needed.
- Delete: Remove tasks permanently, but be careful—this can’t be undone.
- Properties: Edit any task’s settings by right-clicking and selecting Properties.
Common Automation Scenarios and Examples
Here are a few practical ideas beyond just opening programs:
- Daily System Cleanup: Run scripts to clear temp files, empty Recycle Bin, or delete old downloads.
- Automatic Backups: Schedule backup utilities or scripts that copy important files weekly or on logon.
- Launching Apps at Startup: Start programs without cluttering your Startup folder—add a delay if needed to let other services load first.
- Sending Automated Email Reminders: Use PowerShell scripts with Send-MailMessage to send scheduled emails.
- Running Tasks When Idle: Schedule heavy tasks like system scans to run only when your PC is idle.
Troubleshooting Common Issues
Even the best tools hiccup sometimes. Here’s a quick checklist:
- Task Not Running: Double-check triggers, paths, credentials, and security settings.
- Runs But Does Nothing: Output might be hidden—redirect to logs to see what’s going on. Also, consider user context if GUI interaction is needed.
- Task Won’t Wake Computer: Make sure “Wake the computer to run this task” is enabled, and check BIOS/UEFI and network adapter settings.
- Error Code 0x1: Often means wrong path or permission issues. Check paths and rights carefully.
- Empty Task History: Enable task history from the Actions pane for better debugging info.
Best Practices for Using Task Scheduler
- Use clear, descriptive names for your tasks.
- Add detailed descriptions to remember their purpose later.
- Always test tasks manually before relying on them.
- Use full paths instead of relying on environment variables.
- Implement error logging in scripts or redirect output to logs.
- Run tasks with the least privileges needed—don’t grant admin rights unless necessary.
- Backup tasks by exporting them, so you can restore or move them easily.
So, there you have it—a pretty thorough guide to getting started with Windows Task Scheduler. It might seem a bit complex at first, but once you get the hang of it, automating your PC tasks becomes second nature—and honestly, it’s a huge timesaver. Have you tried scheduling anything yet? Or is there a particular task you’re thinking of automating?