Editorial
How to Move files from HDD to SSD in Windows
Boost PC speed! Learn how to safely move files, games, and even your Windows OS from an HDD to an SSD. Step-by-step guide for optimal performance.
Moving files from an old Hard Disk Drive (HDD) to a new Solid State Drive (SSD) is a common step when upgrading your Windows PC for better performance. SSDs offer significantly faster boot times, application loading, and file transfer speeds compared to traditional HDDs. This guide will cover different scenarios for moving files, from personal data to entire operating systems, in Windows 10 and Windows 11.
Understanding HDD vs. SSD
Before we begin, a quick refresher on why this move matters:
- HDD (Hard Disk Drive): A traditional storage device that uses spinning platters and read/write heads to store and retrieve data. They are generally slower, more prone to mechanical failure, but offer higher capacities at a lower cost.
- SSD (Solid State Drive): A modern storage device that uses flash memory (like a large USB drive) to store data. They are significantly faster, more durable, consume less power, and are silent, but typically cost more per gigabyte.
The goal of moving files to an SSD is to place frequently accessed data, your operating system, and demanding applications on the faster drive to improve overall system responsiveness.
Scenario 1: Moving Personal Files (Documents, Photos, Videos)
This is the simplest and most common transfer, suitable for PCs with both an HDD (for bulk storage) and an SSD (for the OS and critical applications).
Step 1: Ensure SSD is Connected and Recognized
- Physical Connection: Make sure your SSD is properly installed and connected to your Windows PC. This typically involves a SATA cable (data) and a SATA power cable from your power supply (for 2.5-inch SSDs) or installing an NVMe SSD into an M.2 slot on your motherboard.
- Initialize and Format (New SSDs Only):
- If it’s a brand new SSD, you might need to initialize and format it before it appears in File Explorer.
- Search: Click the Start button or Search icon, type “Disk Management,” and select “Create and format hard disk partitions.”
- Initialize: Find your new SSD (it might show as “Unallocated”). Right-click on the disk number (e.g., Disk 1) and select “Initialize Disk.” Choose GPT for modern systems.
- Create Simple Volume: Right-click the “Unallocated” space on your SSD, select “New Simple Volume,” and follow the wizard to assign a drive letter and format it (NTFS file system).
- Verify in File Explorer: Open File Explorer (Windows key + E) and confirm your new SSD appears as a drive letter (e.g., D:, E:).
Step 2: Copy/Move Files Using File Explorer
For personal files, a simple drag-and-drop or copy-paste will suffice.
- Open Source Folder (HDD): Navigate to the folder on your HDD containing the files you want to move (e.g., D:\My Documents, E:\Photos).
- Open Destination Folder (SSD): In a separate File Explorer window (or a new tab), open the target folder on your SSD where you want to store the files (e.g., C:\Users\YourName\Documents if your OS is on SSD, or a new folder like F:\My Important Data).
- Drag and Drop (Move) or Copy-Paste:
- Move: Select the files/folders on the HDD, then drag them directly to the SSD folder. By default, dragging files between different drives performs a “Move” operation (deletes from source).
- Copy: Select the files/folders on the HDD, right-click and select “Copy.” Then, right-click in the SSD folder and select “Paste.” This leaves copies on both drives. Once verified, you can manually delete from the HDD.
- Verify Integrity: After the transfer, open a few files from the SSD to ensure they are intact and not corrupted. Delete the original files from the HDD only after successful verification.
Step 3: Redirect User Folders (Optional, but Recommended for Organization)
To automatically save new documents, pictures, etc., to your HDD (if you’re using the SSD for your OS and apps only), you can redirect your user profile folders.
- Right-Click User Folder: Open File Explorer, navigate to C:\Users\YourUserName\.
- Access Properties: Right-click on a folder like “Documents,” “Pictures,” or “Downloads.”
- Go to Location Tab: Select “Properties,” then click the “Location” tab.
- Move Folder: Click the “Move…” button. Navigate to a new location on your HDD (e.g., D:\Users\YourUserName\Documents).
- Confirm: Click “Select Folder,” then “OK.” Windows will ask if you want to move all the files from the old location to the new one. Click “Yes.” Repeat for other folders.
Scenario 2: Moving Installed Applications and Games
Moving applications and especially large games can significantly improve their loading times on an SSD. Simply copying and pasting the program files won’t work for most installed applications, as they rely on registry entries and system links.
Method A: Using “Move” Feature in Windows Settings (Windows 10 & 11)
Windows has a built-in feature to move most Microsoft Store apps and some traditional desktop applications.
- Open Settings: Go to Settings (Windows key + I).
- Navigate to Apps: Click on “Apps” > “Apps & features” (Windows 10) or “Installed apps” (Windows 11).
- Select App to Move: Find the application you want to move in the list. Click on it.
- Click “Move”: If the “Move” button is available and clickable, click it.
- Choose New Drive: Select your SSD from the dropdown list of drives.
- Confirm: Click “Move.”
- Note: If the “Move” button is grayed out, the application cannot be moved this way and requires reinstallation or a dedicated cloning tool (see Method B). Many older Win32 desktop applications cannot be moved via this method.
Method B: Reinstalling Applications (Most Reliable)
For applications that cannot be moved via Windows Settings, the most reliable method is to uninstall them from the HDD and reinstall them onto the SSD.
- Uninstall from HDD: Go to Settings > Apps > Apps & features (or Installed apps), find the application, click it, and select “Uninstall.”
- Reinstall to SSD: Download the installer for the application again. During the installation process, when prompted to choose an installation directory, select a folder on your SSD (e.g., C:\Program Files if your OS is on SSD, or F:\Program Files if your SSD is a secondary drive).
Method C: Symlinks for Specific Folders (Advanced)
Symbolic links (symlinks) are advanced shortcuts that trick applications into thinking a folder is in its original location, while the actual data resides elsewhere. This is useful for large game folders that you can’t easily move or reinstall.
- Move the Folder: First, manually move the large game or application data folder from your HDD to your SSD (e.g., D:\Games\MyGame to F:\Games\MyGame).
- Open Command Prompt as Administrator: Click Start, type cmd, right-click “Command Prompt,” and select “Run as administrator.”
- Create Symlink: Use the mklink command.
- Syntax: mklink /D “Original Path on HDD” “New Path on SSD”
- Example: If your game was in C:\Program Files\MyGame and you moved it to F:\MyGame, the command would be: mklink /D “C:\Program Files\MyGame” “F:\MyGame”
- Press Enter. You should see “symbolic link created.”
- Caution: This is an advanced technique. Ensure paths are correct. Deleting the symlink does not delete the original data.
Scenario 3: Migrating the Entire Windows Operating System to SSD
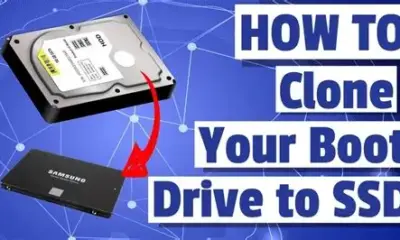
This is known as OS migration or disk cloning. This is the most complex but highly recommended scenario for maximizing SSD benefits, as it moves your entire Windows operating system, installed programs, and data to the SSD, allowing the SSD to become your new primary boot drive.
Prerequisites:
- SSD Capacity: Your SSD must be large enough to hold all the data from your current HDD’s system partition (usually C:). It doesn’t need to be larger than the entire HDD, just larger than the used space on the system partition.
- External Enclosure/Adapter: If you only have one drive bay, you’ll need a USB-to-SATA adapter or external enclosure to connect the new SSD to your PC while the HDD is still installed.
- Cloning Software: While Windows doesn’t have a native cloning tool, many SSD manufacturers (e.g., Samsung, Crucial, Western Digital) provide free cloning software with their drives (often a rebranded version of Macrium Reflect, Acronis True Image, or similar). If your SSD didn’t come with one, free options like Macrium Reflect Free are highly recommended.
Step 1: Prepare Your HDD (Source Drive)
- Clean Up: Uninstall unnecessary programs, run Disk Cleanup, and delete old files from your HDD to reduce the amount of data that needs to be cloned.
- Defragment (HDD only): If your source drive is an HDD, defragment it using Windows’ “Optimize Drives” tool. This can make the cloning process faster.
- Run CHKDSK: Open Command Prompt as Administrator, type chkdsk /f /r and press Enter. If prompted to run on restart, type Y and restart. This checks for and fixes any file system errors.
Step 2: Install and Run Cloning Software
- Install SSD: Connect your new SSD to your Windows PC.
- Install Cloning Software: Install the cloning software provided by your SSD manufacturer or a third-party tool like Macrium Reflect Free.
- Select Source and Destination:
- Open the cloning software.
- Select your HDD (the drive with your Windows operating system) as the source disk.
- Select your new SSD as the destination disk.
- Crucial: Double-check that you’ve selected the correct destination drive, as the cloning process will erase all data on the destination SSD.
- Initiate Clone: Follow the software’s instructions to start the cloning process. This can take several hours depending on the amount of data.
Step 3: Set SSD as Boot Drive
- Shutdown PC: Once the cloning is complete, shut down your Windows PC.
- Remove HDD (Optional, but Recommended): For desktop PCs, it’s often best to physically disconnect the old HDD to ensure the PC boots from the correct drive. For laptops with only one drive bay, you’ll replace the HDD with the SSD.
- Access BIOS/UEFI: Restart your PC and repeatedly press the BIOS/UEFI access key (commonly F2, Del, F10, F12, or Esc) to enter your computer’s setup utility.
- Change Boot Order: Navigate to the “Boot” or “Boot Order” section.
- Prioritize SSD: Set your new SSD as the first boot device.
- Save and Exit: Save your changes and exit BIOS/UEFI. Your PC should now boot from the SSD.
Step 4: Verify and Repurpose HDD (If Still Installed)
- Verify Boot: Confirm your Windows PC boots quickly from the SSD and all your programs and data are accessible.
- Format Old HDD (Optional): If your old HDD is still installed and you want to use it for data storage, you can format its Windows operating system partition to free up space.
- Open Disk Management (Windows key + X > “Disk Management”).
- Locate the old HDD’s primary partition (ensure it’s not your new SSD!).
- Right-click on it, select “Format,” and follow the prompts. This will erase the old Windows operating system and data from that partition.
Moving files and your operating system to an SSD is one of the most rewarding upgrades for a Windows PC, dramatically improving its responsiveness and overall user experience.
FAQ: How to Move Files from HDD to SSD in Windows
Q1: Why should I move files from my HDD to an SSD?
You should move files from an HDD to an SSD primarily for a significant performance boost. SSDs offer much faster read/write speeds, which means:
- Faster Windows operating system boot times.
- Quicker application and game loading.
- Smoother overall system responsiveness.
- Reduced file transfer times. HDDs are slower and often bottleneck modern PCs.
Q2: Can I just copy and paste my operating system (Windows) from HDD to SSD?
No, you cannot simply copy and paste your operating system from an HDD to an SSD. Doing so will result in a non-bootable system. The Windows operating system relies on complex boot sectors, registry entries, and specific file structures that are not preserved by a simple copy-paste. To move your OS, you need to use a disk cloning software (as described in Scenario 3).
Q3: What’s the best way to move a large game from my HDD to SSD?
The best ways to move a large game from an HDD to an SSD are:
- Reinstalling: Uninstall the game from the HDD and reinstall it, choosing your SSD as the installation location. This is the most reliable method.
- Game Launcher Features: Some game launchers (like Steam or Epic Games) have built-in features to move installed games between drives. Check their settings.
- Symbolic Links (Advanced): For very large games or specific folders, you can use symbolic links to move the game’s actual data to the SSD while tricking the game/OS into thinking it’s still in its original HDD location. This requires using the mklink command in Command Prompt as an administrator.
Q4: Will moving my files to an SSD delete them from my HDD?
- “Move” operation (dragging files between drives in File Explorer): Yes, if you drag and drop files from one drive to another, Windows performs a “move” operation by default, deleting them from the source HDD after they’ve been copied to the SSD.
- “Copy” operation (copy-paste): No, if you use copy-paste, the files will remain on the HDD after being pasted to the SSD. You would then need to manually delete the originals from the HDD once you’ve verified the copies on the SSD.
- Disk Cloning: The cloning process copies the entire contents of the source HDD to the destination SSD. It does not delete data from the source HDD. However, the destination SSD will be completely overwritten.
Q5: What should I do with my old HDD after migrating Windows to the SSD?
After successfully migrating Windows to your SSD and confirming it boots and runs correctly:
- Keep as Storage: You can format the old HDD’sWindows operating system partition and repurpose the entire drive for bulk data storage (documents, photos, videos, less frequently played games). This is a common and practical use.
- External Drive: If you have a laptop with only one drive bay, you can buy an external HDD enclosure to turn your old HDD into a portable external storage drive.
- Wipe and Dispose: If you no longer need it, ensure you securely wipe all data from the HDD before disposing of it.


