Editorial
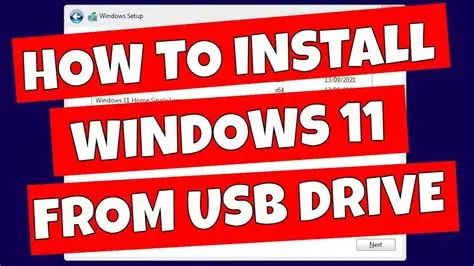
How to Clean Install Windows 11 from USB Step by Step
Learn how to perform a clean installation of Windows 11 from a USB drive, covering prerequisites, media creation, and the full installation process.
A clean installation of Windows 11 from a USB drive is often the best way to get a fresh start on your computer. This process removes all existing data from your system drive and installs a brand-new copy of the operating system. It helps resolve system performance issues, remove stubborn malware, or prepare a new computer for use. This guide will walk you through each step to perform a clean install of Windows 11 using a bootable USB drive.
Before You Start: Important Preparations
Before beginning the installation, there are a few critical steps to take to ensure a smooth process and prevent data loss.
- Back Up Your Data
A clean install erases everything on the drive where Windows 11 will be installed. This includes all your documents, photos, videos, applications, and settings.
- External Hard Drive: Connect an external hard drive and copy all important files.
- Cloud Storage: Use services like OneDrive, Google Drive, or Dropbox to upload your files.
- USB Drives: For smaller amounts of data, multiple USB drives can be used.
- Check System Requirements
Ensure your PC meets the minimum system requirements for Windows 11:
- Processor: 1 GHz or faster with 2 or more cores on a compatible 64-bit processor or System on a Chip (SoC).
- RAM: 4 GB or greater.
- Storage: 64 GB or greater available storage.
- System Firmware: UEFI, Secure Boot capable.
- TPM: Trusted Platform Module (TPM) version 2.0.
- Graphics Card: Compatible with DirectX 12 or later with WDDM 2.0 driver.
- Display: High definition (720p) display greater than 9” diagonally, 8 bits per color channel.
- Internet Connection and Microsoft Account: Required for initial setup of Windows 11 Home edition.
You can use the PC Health Check app from Microsoft to confirm if your PC is compatible.
- Get Your Windows 11 Product Key
If you have a digital license linked to your Microsoft account, Windows 11 will activate automatically after installation. If you have a product key, make sure you have it written down or saved. For many modern PCs that came with Windows 10, the license is embedded in the hardware (UEFI firmware) and will activate automatically for Windows 11 as well.
- Prepare a USB Drive
You will need a USB flash drive with at least 8 GB of storage. This drive will be formatted during the process, so ensure it does not contain any important data.
Step 1: Create Windows 11 Installation Media
Microsoft provides a Media Creation Tool that simplifies the process of creating a bootable Windows 11 USB drive.
- Download the Media Creation Tool:
- Go to the official Microsoft Windows 11 download page: www.microsoft.com/software-download/windows11.
- Under the section “Create Windows 11 Installation Media,” click “Download Now”. Save the MediaCreationToolW11.exe file to your computer.
- Run the Media Creation Tool:
- Double-click the downloaded MediaCreationToolW11.exe file.
- Accept the license terms.
- Choose Language and Edition:
- The tool will automatically detect your current language and edition. You can uncheck “Use recommended options for this PC” if you need to select a different language or edition.
- Click “Next”.
- Select Media Type:
- Choose “USB flash drive” as the media type.
- Click “Next”.
- Select USB Drive:
- From the list, select the USB drive you wish to use. Make sure it’s the correct one, as all data on it will be deleted.
- Click “Next”.
- Download and Create:
- The tool will now download the Windows 11 files and create the bootable USB drive. This process can take some time depending on your internet speed.
- Once finished, click “Finish”. Your bootable Windows 11 USB drive is now ready.
Step 2: Boot Your PC from the USB Drive
To start the installation, you need to tell your computer to boot from the newly created USB drive.
- Insert the USB Drive:
- Plug the bootable USB drive into a USB port on your computer.
- Restart Your PC:
- Restart your computer.
- Enter BIOS/UEFI Firmware Settings or Boot Menu:
- As your PC starts, you need to press a specific key repeatedly to enter the BIOS/UEFI firmware settings or the Boot Menu. Common keys include:
- Del (Delete)
- F2
- F10
- F12
- Esc
- The exact key varies by manufacturer (e.g., Dell, HP, Lenovo, ASUS, Acer). Look for an on-screen message during startup or consult your PC’s manual or manufacturer’s website.
- As your PC starts, you need to press a specific key repeatedly to enter the BIOS/UEFI firmware settings or the Boot Menu. Common keys include:
- Change Boot Order (if using BIOS/UEFI):
- Once in BIOS/UEFI, navigate to the “Boot” tab or section.
- Change the boot order to prioritize the USB drive (often listed as “USB HDD,” “USB Device,” or by the brand of your USB drive) as the first boot device.
- Save changes and exit. Your PC should now restart and boot from the USB.
- Select Boot Device (if using Boot Menu):
- If you successfully opened the Boot Menu, simply select your USB drive from the list and press Enter.
Step 3: Windows 11 Clean Installation Process
Once your PC boots from the USB drive, the Windows 11 setup wizard will appear.
- Windows Setup Screen:
- Select your Language, Time and currency format, and Keyboard layout.
- Click “Next”.
- Install Now:
- Click the “Install now” button.
- Enter Product Key (or skip):
- If prompted, enter your Windows 11 product key.
- If you have a digital license or plan to activate later, click “I don’t have a product key”. Windows will activate automatically once connected to the internet after installation if a digital license is found.
- Choose Operating System:
- Select the edition of Windows 11 you want to install (e.g., Windows 11 Home, Windows 11 Pro). Make sure it matches your product key or digital license.
- Click “Next”.
- Accept License Terms:
- Check the box “I accept the Microsoft Software License Terms”.
- Click “Next”.
- Choose Installation Type:
- Select “Custom: Install Windows only (advanced)”. This is crucial for a clean install, as it allows you to format the drive.
- Select Drive and Format:
- You will see a list of drives and partitions.
- Identify the drive where you want to install Windows 11. This is usually “Drive 0” or your main SSD/HDD. Be very careful here, as selecting the wrong drive will erase data from it.
- Select each partition related to your current Windows installation (e.g., System, Recovery, Primary partitions on your main drive) and click “Delete”. Confirm any warnings. This will free up space and create “Unallocated Space.”
- Once the main drive is shown as “Unallocated Space,” select it.
- Click “Next”. Windows will create necessary partitions and begin the installation.
- Installation Begins:
- Windows 11 will now begin copying files and installing the operating system. Your PC will restart several times during this process. Do not remove the USB drive until prompted.
Step 4: Initial Windows 11 Setup
After the installation files are copied and your PC restarts, you will go through the initial setup for Windows 11.
- Region Selection:
- Select your country or region.
- Click “Yes”.
- Keyboard Layout:
- Confirm your keyboard layout.
- Click “Yes”.
- You can add a second keyboard layout if needed, or click “Skip”.
- Name Your Device (Optional):
- You can name your device now or choose to “Skip for now.”
- How will you set up this device?:
- Choose “Set up for personal use” or “Set up for work or school” based on your usage.
- Click “Next”.
- Sign in with your Microsoft account:
- Enter your Microsoft account email, phone, or Skype name.
- Click “Next” and follow the prompts to sign in.
- If you prefer a local account (though not recommended for Home edition without workarounds), you might need to disconnect from the internet or use specific workarounds during this step.
- Create a PIN:
- Create a PIN for faster sign-ins.
- Privacy Settings:
- Review and adjust your privacy settings (e.g., location, diagnostic data). Microsoft defaults often enable many options; disable any you are not comfortable with.
- Click “Accept”.
- Customize Your Experience (Optional):
- Select how you plan to use your device for personalized suggestions. You can skip this step.
- Let’s customize your experience:
- This is an optional step where you can choose specific interests to tailor your Windows experience. You can skip this.
- OneDrive Backup:
- Choose whether to back up your files to OneDrive or only save them to this PC.
- Check for Updates:
- Windows will now check for and install any available updates.
- Your PC will prepare your desktop. This may take a few minutes.
Once completed, you will be taken to the Windows 11 desktop. Your clean installation is complete! Remember to install necessary drivers (especially for graphics and network, if not automatically detected), your applications, and restore your backed-up data.
Frequently Asked Questions (FAQ)
Q1: What is the main difference between a clean install and an upgrade?
A1: A clean install completely erases your hard drive and installs a fresh copy of Windows, removing all old files and programs. An upgrade installs the new version of Windows over your existing one, keeping your files, applications, and settings.
Q2: Do I need an internet connection to perform a clean install of Windows 11?
A2: No, you do not need an internet connection during the main installation phase. However, an internet connection and a Microsoft account are required for the initial setup of Windows 11 Home edition. For Windows 11 Pro, you can set up a local account without an internet connection initially.
Q3: What size USB drive do I need for a Windows 11 clean install?
A3: You need a USB flash drive with at least 8 GB of storage.
Q4: Will a clean install remove all my personal files?
A4: Yes, a clean install will delete all data on the drive where you choose to install Windows 11. It is critical to back up all your important files before starting the process.
Q5: My PC isn’t booting from the USB. What should I do?
A5: Ensure the USB drive is properly inserted. Restart your PC and repeatedly press the correct key (e.g., F2, Del, F12) to enter your BIOS/UEFI settings or Boot Menu. In the BIOS/UEFI, check the boot order and ensure the USB drive is prioritized. If using the Boot Menu, select the USB drive directly from the list. Also, confirm that your USB drive was created correctly as a bootable drive using the Media Creation Tool.


