Editorial
How to Check Disk Space in Windows PC
Learn how to check disk space in Windows 11, 10, 8.1, and 7 using File Explorer, Settings, and Command Prompt to manage your storage.
Understanding your disk space usage is crucial for maintaining a healthy and efficient Windows PC. Whether you’re running out of room for new software, experiencing slow performance, or simply trying to organize your files, knowing how much storage is available on your hard drive or SSD is the first step. A lack of free space can lead to system instability, prevent updates, and significantly impact your computer’s speed.
The way we interact with computer storage has evolved considerably. Early personal computers had limited storage, and users were acutely aware of every byte. With the advent of multi-gigabyte hard drives and later Solid State Drives (SSDs), storage capacity exploded. However, despite larger drives, the sheer volume of operating system files, applications, games, and personal media means that disk space management remains a relevant and necessary skill for all Windows users. Microsoft has continuously refined the tools for checking disk space across different Windows versions, making it more accessible and visually intuitive in recent iterations like Windows 10 and Windows 11.
This guide will walk you through various methods to check disk space in Windows 11, 10, 8.1, and 7, helping you identify how much space is used and what’s consuming it.
Understanding Storage Terminology
Before we dive in, let’s clarify a few terms:
- Disk Space: Refers to the total storage capacity of your hard drive (HDD) or Solid State Drive (SSD).
- Free Space: The amount of storage that is currently unused and available for new files or programs.
- Used Space: The amount of storage currently occupied by files, programs, and the operating system.
- Local Disk (C:): This is typically your primary drive where Windows and most of your programs are installed. Other drives might be labeled D:, E:, etc.
- Storage Sense: A Windows 10 and Windows 11 feature that automatically frees up space by deleting temporary files and managing your Recycle Bin.
Method 1: Using File Explorer (All Windows Versions)
The quickest and most common way to check disk space is through File Explorer (formerly Windows Explorer). This method provides a clear visual representation of your drive usage.
- Open File Explorer:
- Windows 11/10/8.1: Click the File Explorer icon on your Taskbar (looks like a folder) or press Windows key + E.
- Windows 7: Click the Start button and select “Computer” or “My Computer.”
- Navigate to This PC/Computer:
- In the left-hand navigation pane, click on “This PC” (Windows 11/10/8.1) or “Computer” (Windows 7).
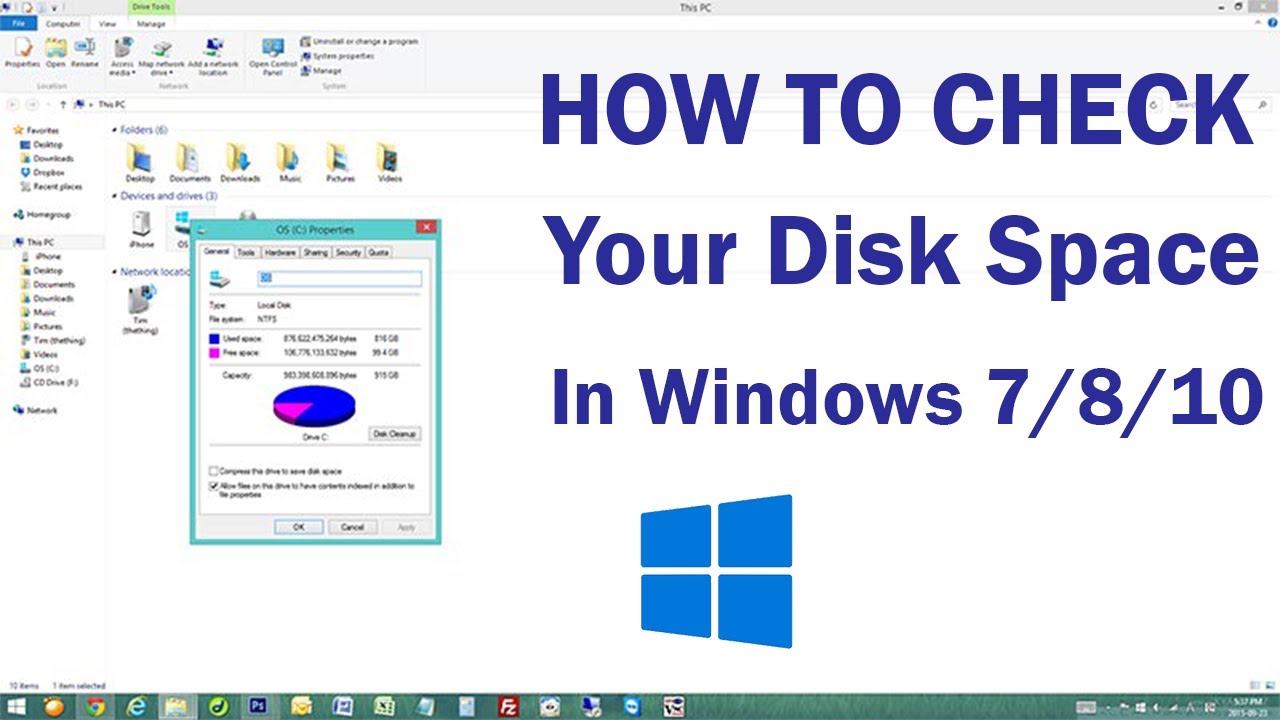
- View Drive Information:
- You’ll see a list of your storage drives (Local Disk (C:), D:, etc.), including any external drives or network locations.
- For each drive, you’ll see a bar graph indicating the used space versus the total capacity, along with the exact numerical values for free space and total size.
- Example: 100 GB free of 256 GB.
This method gives you an instant overview of your drive status.
Method 2: Using Windows Settings (Windows 11 & 10)
Windows 11 and Windows 10 introduced a more detailed storage breakdown within the Settings app, making it easier to see what types of files are consuming your disk space.
For Windows 11:
- Open Settings: Press Windows key + I or click the Start button and select the gear icon.
- Navigate to Storage: Go to “System” > “Storage.”
- View Storage Usage:
- You’ll see an overview of your primary drive (C: drive) showing total space, used space, and free space.
- Click on “Temporary files,” “Apps & features,” “Documents,” “Other,” etc., to see a detailed breakdown of what’s using space within each category.
- Clicking on these categories (e.g., “Apps & features”) will often allow you to directly manage or uninstall items, helping you free up space.
- Manage Other Drives:
- Below the primary drive summary, you’ll see “Advanced storage settings.”
- Click on “Storage on other drives” to view and manage space on your other internal or external drives.
For Windows 10:
- Open Settings: Press Windows key + I or click the Start button and select the gear icon.
- Navigate to Storage: Go to “System” > “Storage.”
- View Storage Usage:
- You’ll see an overview of your primary drive (C: drive) with a bar indicating usage.
- Click on “Temporary files,” “Apps & games,” “Documents,” “Other,” etc., to see a detailed breakdown of how space is being used.
- Clicking on each category will show you exactly which files or apps are taking up space and provide options to manage them.
- Manage Other Drives:
- Scroll down to “More storage settings” and click “View storage usage on other drives” to see similar breakdowns for your other drives.
Method 3: Using Disk Management (All Windows Versions)
Disk Management is a more advanced tool that shows you a graphical representation of all your storage devices, including hidden partitions and unallocated space. It’s especially useful for understanding drive partitions.
- Open Disk Management:
- Windows 11/10/8.1: Right-click the Start button or press Windows key + X, then select “Disk Management.”
- Windows 7: Right-click on “Computer” (or “My Computer”) on your desktop or in the Start Menu, and select “Manage.” In the Computer Management window, select “Disk Management” under “Storage.”
- View Drive Layout:
- You’ll see a list of all your physical disks (Disk 0, Disk 1, etc.) and their various partitions (C:, D:, Recovery, etc.).
- For each partition, you’ll see its capacity, free space, and file system type.
- The graphical representation helps visualize the layout of your drives.
While Disk Management doesn’t tell you what specific files are using space, it’s excellent for understanding your drive’s overall partitioning and capacity.
Method 4: Using Command Prompt (All Windows Versions)
For users comfortable with text-based interfaces, the Command Prompt (or PowerShell) offers a quick way to get disk space information.
- Open Command Prompt (or PowerShell):
- Windows 11/10/8.1: Right-click the Start button or press Windows key + X, then select “Windows Terminal,” “Command Prompt,” or “PowerShell.” (Administrator privileges are not required for this specific command).
- Windows 7: Click the Start button, search for “cmd,” and open “Command Prompt.”
- Type the command:
- In the Command Prompt window, type the following command and press Enter:
DOS
wmic logicaldisk get Caption,Freespace,Size,VolumeName
- Explanation:
- Caption: The drive letter (e.g., C:).
- Freespace: The amount of free space in bytes.
- Size: The total size of the drive in bytes.
- VolumeName: The name of the drive (e.g., OS, Data).
- Explanation:
- Interpret the results: The output will show you a list of your drives with their free space and total size in bytes. You’ll need to convert these large numbers to gigabytes (GB) or terabytes (TB) by dividing them by 1,073,741,824 (for GB).
- To quickly convert bytes to GB, divide the number by 109 (1 billion) for a rough estimate, or 230 (1,073,741,824) for a precise conversion.
In this example:
- C: drive has approximately 100 GB free out of 256 GB total.
- D: drive has approximately 500 GB free out of 1 TB total.
This method is quick for programmatic checks or if you prefer the command line.
Why is Checking Disk Space Important?
Regularly monitoring your disk space is a good practice for several reasons:
- Performance: When a drive, especially your system drive (C:), runs out of free space, Windows starts to slow down significantly. This is because the operating system needs room for temporary files, virtual memory (paging file), and system updates. SSDs, in particular, require a certain percentage of free space to maintain optimal performance and longevity.
- Updates and Installations: Many Windows updates and new software installations require a minimum amount of free space. If you don’t have enough, updates will fail, and you won’t be able to install new applications.
- System Stability: Extremely low disk space can lead to system crashes, application errors, and instability.
- Data Management: It helps you identify large files or programs that you no longer need, enabling you to free up space and keep your drive organized.
Conclusion
Knowing how to check disk space in Windows is a fundamental skill for any PC user. Whether you prefer the visual simplicity of File Explorer, the detailed breakdown in Windows Settings, the comprehensive overview in Disk Management, or the quick data from Command Prompt, Windows provides multiple tools to suit your preference. Regularly monitoring your storage and taking steps to free up space when needed will ensure your Windows PC runs smoothly and efficiently for years to come.
Frequently Asked Questions (FAQ)
Q1: How much free disk space should I leave on my C: drive?
It’s generally recommended to keep at least 15-20% of your primary drive (C: drive) free. For example, on a 256 GB drive, aim for at least 40-50 GB free. This ensures Windows has enough room for updates, temporary files, virtual memory, and to maintain optimal performance, especially for SSDs.
Q2: What’s the difference between GB and GiB when talking about storage?
This is a common point of confusion.
- GB (Gigabyte) refers to powers of 103 (decimal system), meaning 1 GB = 1,000,000,000 bytes. This is what hard drive manufacturers typically use.
- GiB (Gibibyte) refers to powers of 210 (binary system), meaning 1 GiB = 1,073,741,824 bytes. This is what Windows (and other operating systems) typically use for displaying file and drive sizes. This discrepancy explains why a “500 GB” hard drive often shows up as “465 GiB” in Windows.
Q3: My PC is running slow, and I have very little free space. What should I do?
This is a clear indicator that lack of disk space is affecting performance.
- Run Disk Cleanup (search for it in Windows).
- Use the Storage settings (Windows 10/11) to identify and uninstall large, unused apps.
- Move large files (videos, photos) to an external drive or cloud storage.
- Empty your Recycle Bin.
- Delete temporary files.
Q4: Does clearing temporary files delete my personal data?
No. Temporary files are typically residual files created by programs or web browsers (e.g., cached web pages, installation leftovers) that are no longer needed. Deleting them is safe and will not affect your personal documents, photos, or installed programs.
Q5: Can I check disk space for a network drive?
Yes, you can check disk space for a network drive (a shared folder on another computer or server) using File Explorer.
- Open File Explorer.
- Navigate to “This PC” (or “Computer”).
- Under “Network locations” or “Network drives,” you’ll see the mapped network drive. It will typically show its free space and total capacity just like local drives.