Editorial
How to Compress Files and Folders on Your Windows Laptop
Learn how to compress files and folders on your Windows laptop to save space and facilitate sharing. This guide covers built-in ZIP features and third-party tools.
Compressing files and folders on your Windows laptop is a valuable skill for saving storage space, making files easier to send via email, or grouping multiple items into a single, manageable package. Windows has a built-in compression utility that works with the popular ZIP format, eliminating the need for third-party software for basic tasks. This guide will walk you through the precise steps on how to compress files and folders on your Windows laptop, ensuring you can efficiently manage your digital data.
Understanding File Compression
File compression reduces the size of files and folders by encoding the data using various algorithms. This process can significantly shrink the storage space required for certain types of files (e.g., documents, uncompressed images), making them quicker to transfer or store. The most common compression format on Windows is ZIP, which creates a single compressed archive (a .zip file) containing your selected items.
Benefits of Compressing Files:
- Saves Storage Space: Frees up space on your hard drive, especially for large collections of files.
- Faster Transfers: Compressed files upload and download more quickly, ideal for email attachments or cloud storage.
- Easy Organization: Bundle multiple files and folders into a single, neat package.
- Password Protection (with third-party tools): Some tools allow you to encrypt compressed archives for added security.
Let’s begin the compression process.
- Compressing a Single File or Folder (Built-in Windows Feature)
Windows’ native ZIP compression is straightforward and accessible from the right-click context menu.
- Step 1: Locate the File or Folder.
- Open File Explorer (Windows key + E) and navigate to the location of the file or folder you wish to compress.
- Step 2: Right-Click and Select “Compress.”
- Right-click on the specific file or folder.
- In the context menu that appears, hover over or select “Send to.”
- From the “Send to” submenu, click on “Compressed (zipped) folder.”
- Step 3: Name the Compressed File.
- A new compressed .zip file will be created in the same location as the original item. Its name will be the same as the original file/folder, but with a .zip extension.
- You can now rename this .zip file if you wish, just like any other file (click on it once, then again, or right-click and select “Rename”).
- Step 4: Verify Compression (Optional).
- You can right-click the newly created .zip file and select “Properties” to see its size and compare it to the original file/folder’s size.
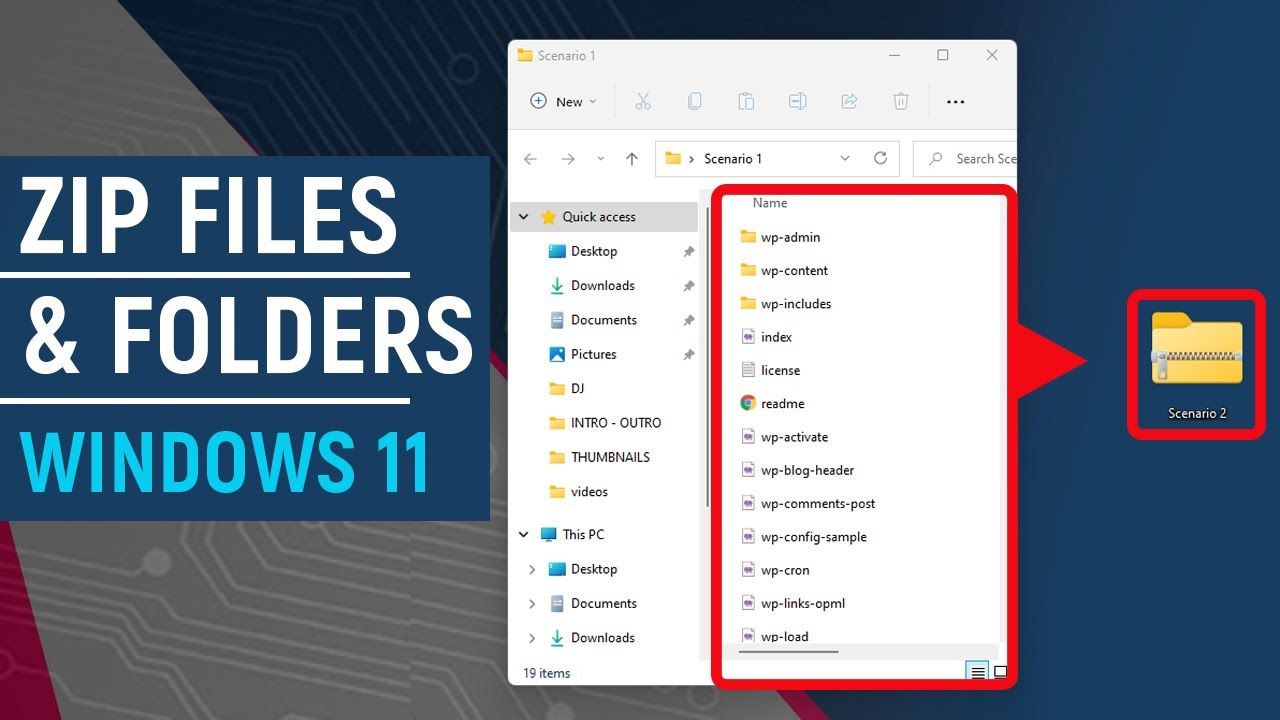
- Compressing Multiple Files and/or Folders at Once
You can easily group several items into a single compressed archive.
- Step 1: Select Multiple Items.
- In File Explorer, navigate to the location containing the files and/or folders you want to compress.
- Select the items:
- To select adjacent items, click the first item, then hold Shift and click the last item.
- To select non-adjacent items, hold Ctrl and click each item individually.
- Step 2: Right-Click and Compress.
- Right-click on any one of the selected items.
- In the context menu, hover over or select “Send to.”
- Click on “Compressed (zipped) folder.”
- Step 3: Name the Compressed File.
- A single .zip file will be created, containing all the selected items. Its default name will usually be based on the first item selected.
- Rename the .zip file to something descriptive.
- Compressing an Entire Drive or Large Number of Files/Folders
For very large operations, especially for an entire drive, Windows offers a direct compression attribute for files and folders, though this is less about creating archives and more about saving space on the drive itself.
- Step 1: Locate the Drive/Folder.
- Open File Explorer.
- Right-click on the drive (e.g., Local Disk (C:) or a specific large folder.
- Select “Properties.”
- Step 2: Enable Compression Attribute.
- In the Properties window, on the “General” tab, look for “Compress contents to save disk space.”
- Check the box next to this option.
- Click “Apply.”
- Step 3: Apply Compression.
- You’ll be asked if you want to apply changes to “this folder only” or “this folder, subfolders, and files.”
- Select the appropriate option. For a full drive or entire folder, choose the latter.
- Click “OK.” Windows will then compress the files in the background. Files that are compressed will often show two small arrows pointing towards each other on their icon.
- Note: This method is transparent. Files are compressed when stored and automatically decompressed when accessed. It’s best for files you access frequently but want to save space on. It doesn’t create a .zip archive.
- Opening/Extracting Compressed Files
To access the contents of a .zip file, you need to extract them.
- Step 1: Locate the Compressed File.
- Find the .zip file in File Explorer.
- Step 2: Extract All.
- Right-click on the .zip file.
- Select “Extract All…”
- Step 3: Choose Destination and Extract.
- A dialog box will appear. You can choose the destination folder where you want the extracted files to be saved. By default, it will create a new folder with the same name as the .zip file in the current location.
- Check “Show extracted files when complete” if you want to open the folder immediately.
- Click “Extract.“ The original .zip file will remain intact.
- Using Third-Party Compression Software (for Advanced Needs)
While Windows’ built-in ZIP utility is good for basic tasks, third-party software offers more features, better compression ratios, and support for other formats (like RAR, 7z).
- Popular Options:
- 7-Zip (Free & Open Source): Highly recommended for its excellent compression ratio (especially with 7z format) and wide format support.
- WinRAR (Paid, with free trial): Another very popular choice, known for its .rar format support.
- WinZip (Paid, with free trial): One of the oldest and most well-known archivers.
- General Steps for Third-Party Software:
- Step 1: Download and Install. Get the software from its official website.
- Step 2: Integrate with Context Menu. Most of these tools integrate into your right-click context menu automatically.
- Step 3: Compress Files.
- Right-click on the file(s) or folder(s) you want to compress.
- Hover over the software’s name (e.g., “7-Zip”).
- Select “Add to archive…” (or “Add to [filename].zip/7z/rar”).
- In the software’s dialog box, you can choose the archive format, compression level, add a password, split the archive, etc.
- Click “OK” or “Add”.
- Step 4: Extract Files.
- Right-click on the compressed archive.
- Hover over the software’s name.
- Select “Extract files…” (to choose destination), “Extract Here” (extract to current folder), or “Extract to [folder name]/” (extract to new folder with archive name).
By mastering these methods, you can effectively compress files and folders on your Windows laptop, optimizing your storage, facilitating sharing, and keeping your digital workspace tidy.